Additive Manufacturing Is for Everyone — Not Just Big Companies
© Stratnel Technologies LLP

© Stratnel Technologies LLP
Are additive manufacturing methods meant only for high-end product companies like large aerospace, automotive, or medical devices companies — and hobbyists? Not any more. It is getting to be more mainstream in almost all industries regardless of complexity, sophistication, segment, or size.
Why is it that some industries are benefitting more from additive manufacturing than others? One big reason is that they have learnt the lessons to design differently for 3D printing. Here we will talk about how product designing processes have to be different.
The set of "Design Principles" traditionally used must be revisited to take full advantage of additive manufacturing and 3D printing.
Traditional Design Principles Will Not Work with 3D Printing
The following traditional design principles will not apply when you are designing to leverage 3D printing.
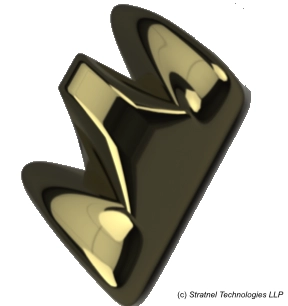
Traditional manufacture may require a lot of machining for a complex shape like this — but with 3D printing this product is straightforward to design and print.
All these may appear difficult to the uninitiated — but the benefits are substantial. Imagine the advantages of replacing an engineering process costing $800 and taking 10 days with another more elegant solution that costs only $200 and takes only 2 days. If such economies are in fact realisable, how many different processes in your workplace could you deploy additive manufacturing to gain competitive advantage?
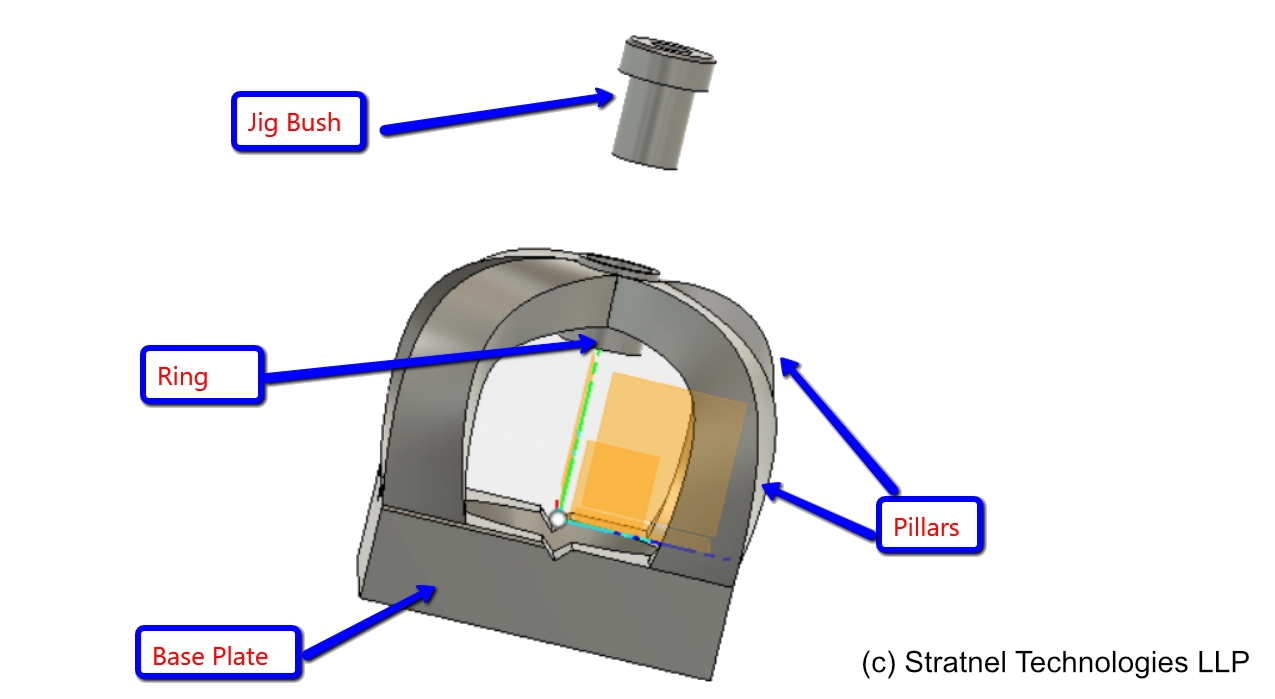
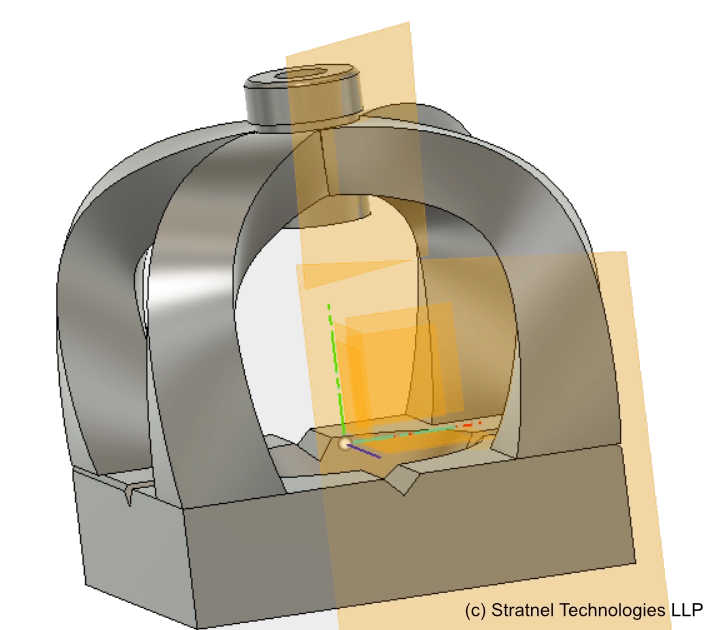
The Drill Jig — A Design Example
Let us talk specifics. Consider a drill jig for drilling axial holes in a spherical object in all three axes. The idea is that one first drills a hole by centering the sphere in a conical locator, locates the first drilled hole on two pins resting on a V-block, and repeats the same exercise in another orientation for the third axis.
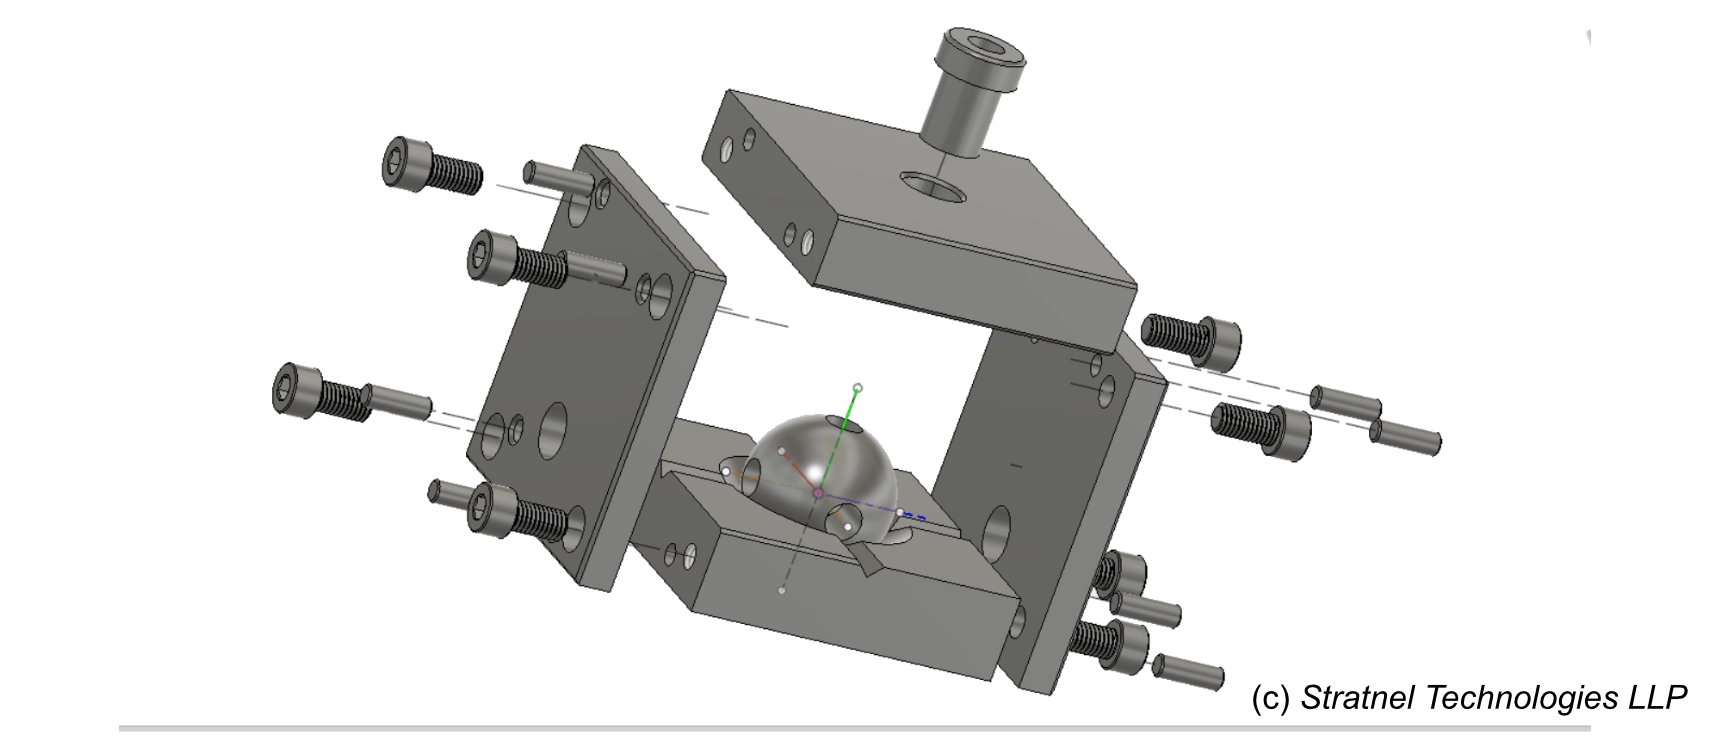
A traditionally made and assembled jig may look like this. This design is representative and will need further work to ensure clamping and other requirements.
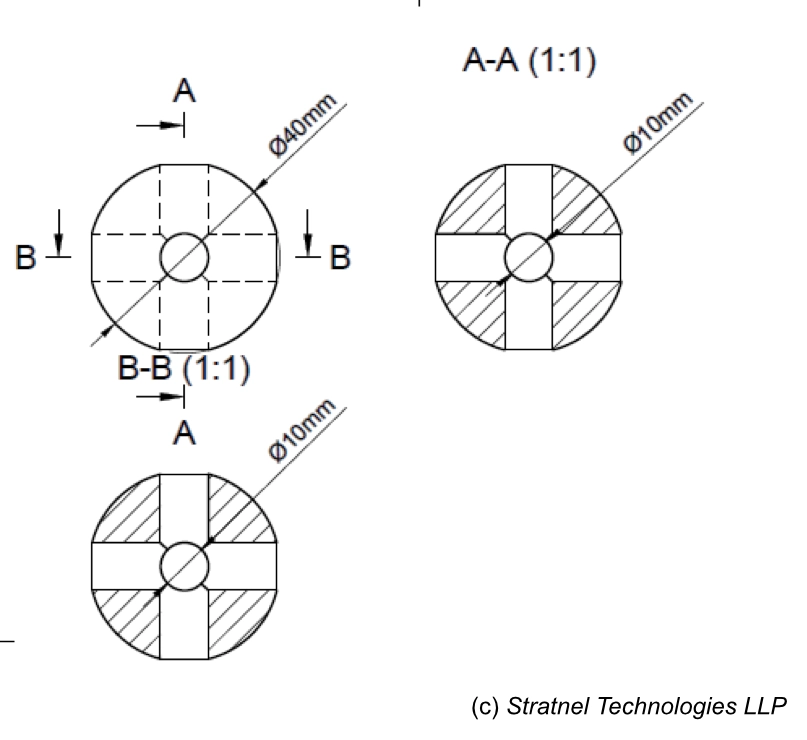
A 3D printed jig will be a lot easier to make with just two parts:
- A structure to locate the parts, the pins, and the jig bush.
- The jig bush itself.
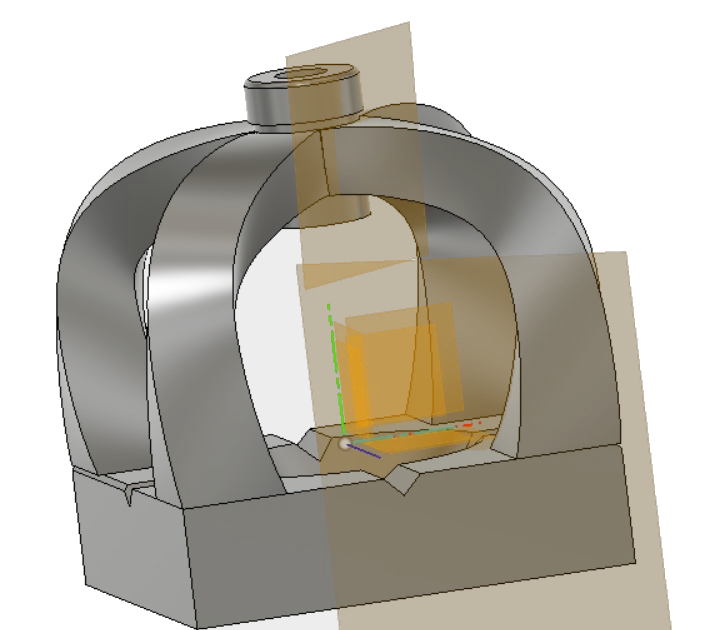
Design Steps for Additive Manufacturing
The design steps in Fusion 360 are as follows:
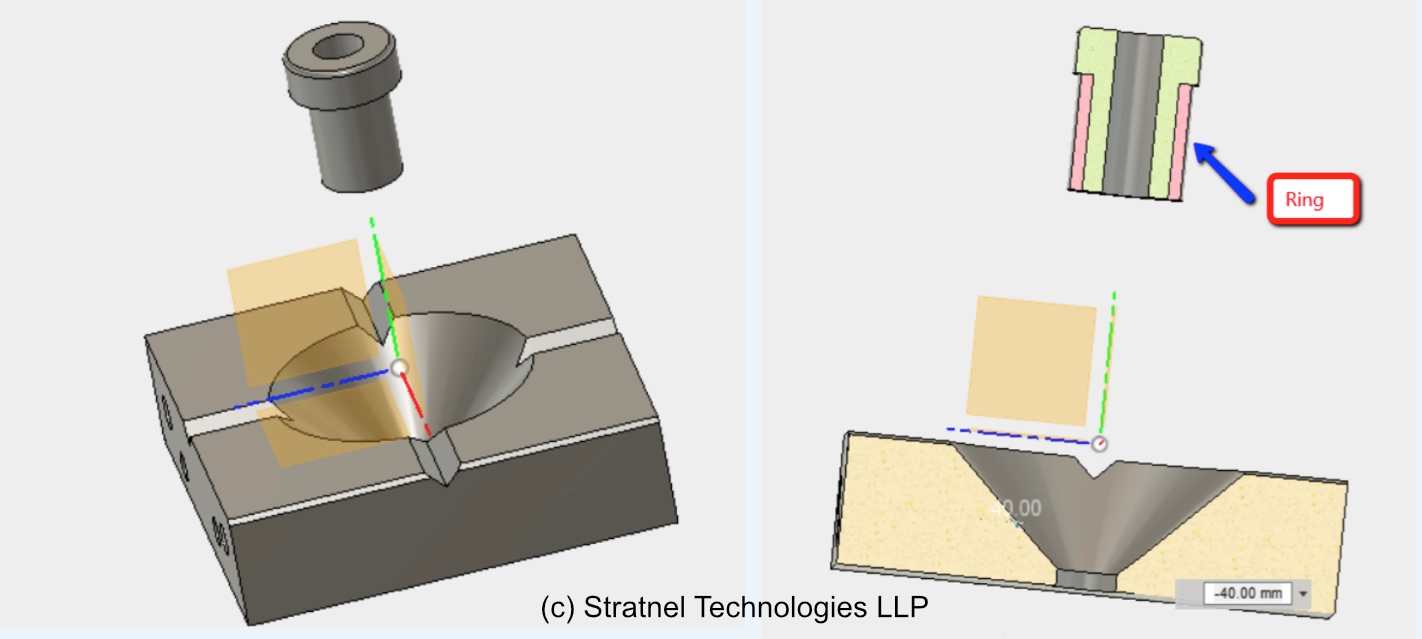
Create the base with the conical locator and the V-groove for the pins, and locate the bush at the correct position. Generate a ring body around the bush to house the bush.
Generate the starting area of the pillars on the top surface of the base plate. Generate a plane normal to the base and at 45° to the edge of the plate, where you can draw the spline path for the pillar. Create a plane normal to the spline path at the end of the spline, close to the jig bush.
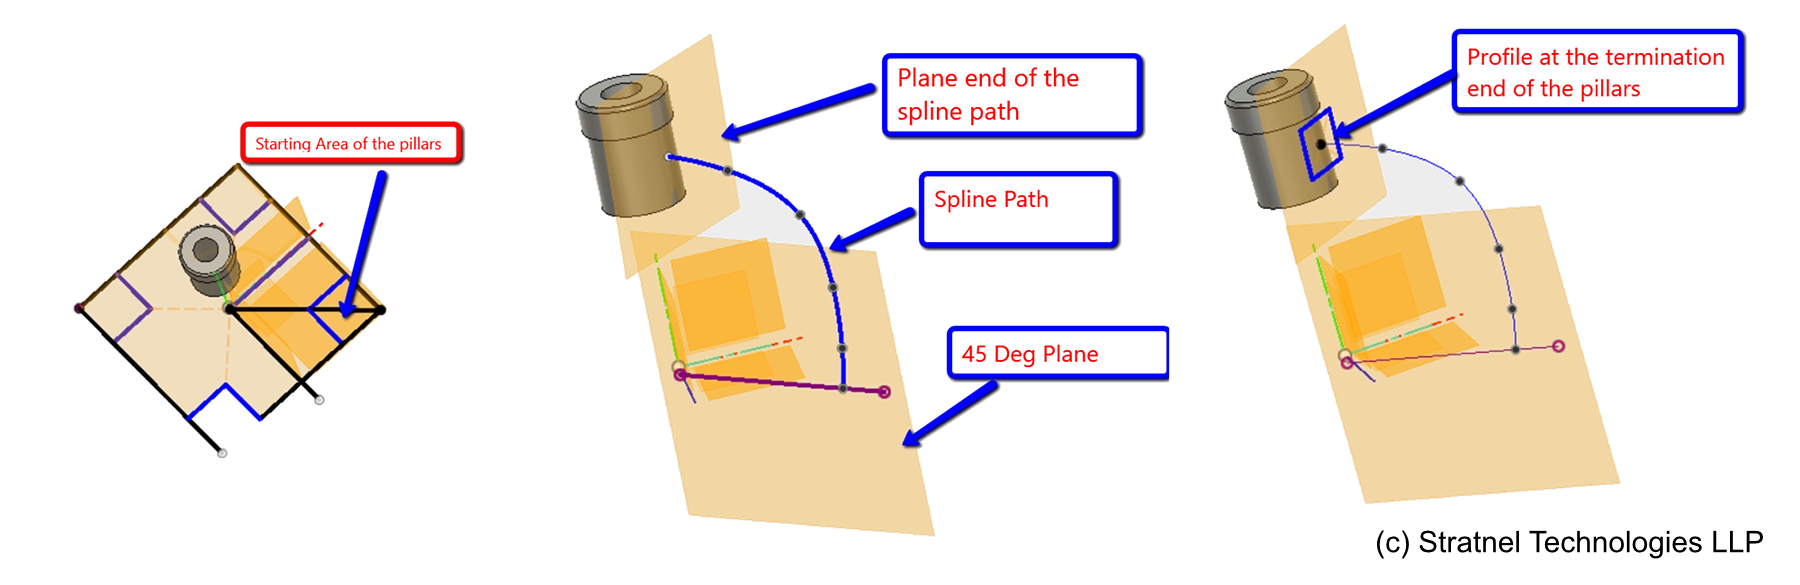
Generate a new body by lofting the starting area of the pillars and the profile at the termination end, along the spline path. Generate a circular pattern of the new body to get the four pillars.
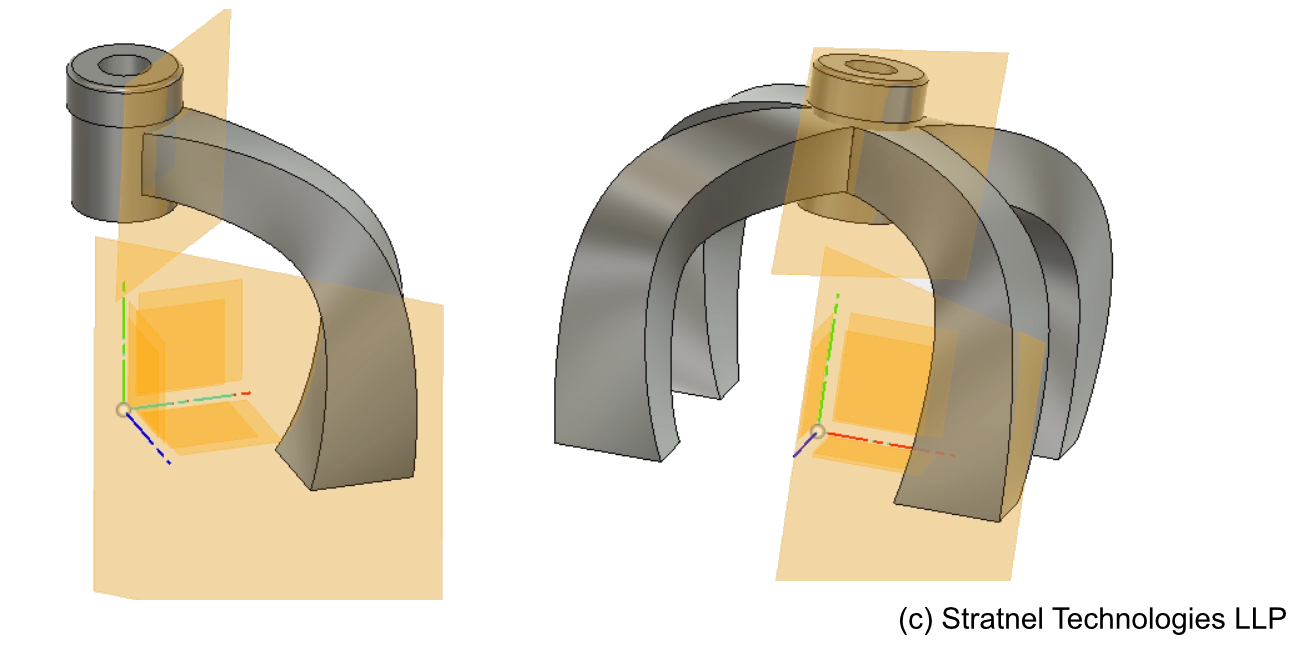
Combine the bodies — the base plate, the ring around the jig bush, and the pillars — into one body. Convert to a component, and the job is done.
Shift in Design Paradigm for 3D Printing
Designers have to be innovative and think out of the box when designing for 3D printing. This is new learning and challenges the traditional concepts learnt so far by designers. Additive manufacturing does challenge traditional manufacturing — and designers have to make suitable changes in their thinking in order to be successful.
Have a question or a perspective to add? Write to us below — we read every message, and may feature selected responses in a future post.